2 Sisters 2 Cities

Image Map
  • About 2 Sisters 2 Cities
  • Recipe Index
  • Project Index
  • Contact Us
  • Like us on Facebook
  • Follow m on twitter
  • Follow k on twitter
  • Follow 2S2C on Pinterest
  • Follow 2S2C on G+
  • rss
  • e-mail 2S2C

Archives for July 2013

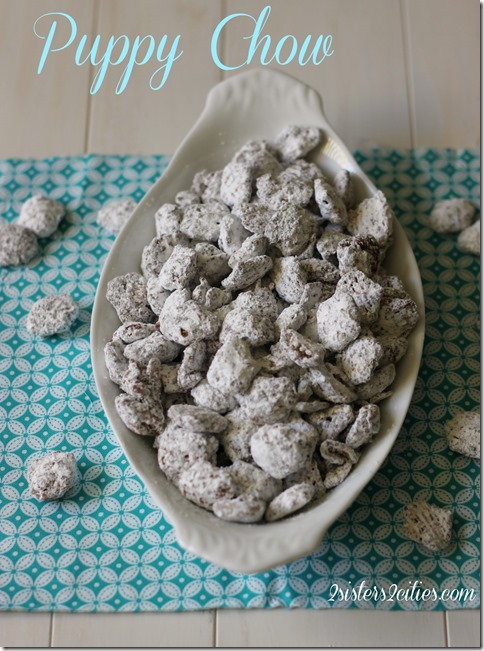
Puppy Chow

Posted by Keelin Hollenbeck on July 28, 2013

Puppy Chow

No, this isn’t a recipe for dog food!   This is a recipe for a snack dessert mix with corn/rice cereal covered in peanut butter, chocolate and powdered sugar for humans only.  Why is it called puppy chow?  I am not quite sure, maybe because it’s so addictive it makes you want to put your head in the bowl and just chow it down like a dog eating food.  I haven’t got to that point yet, but I wouldn’t put it past me!  Puppy chow is also sometimes called Muddy Buddies, which is the name Chex coined for it.

I was first introduced to puppy chow at my elementary school’s career day.  Yes, my elementary school had career day but it wasn’t like a college or high school career day.  It was more like fun activity day where you got to try things like cross country skiing, cake decorating, cooking, sewing, basket weaving, aerobics, and other fun crafty activities.   I don’t think it helped us to actually choose a career.  The activities I picked during the time I am remembering was cooking and making stained glass.   During our cooking class we learned how to make Puppy Chow.

*Note-Please do not feed this “puppy chow” to you pets.  Despite that name, this treat is not for dogs and could actually be harmful to your pets because it contains chocolate.
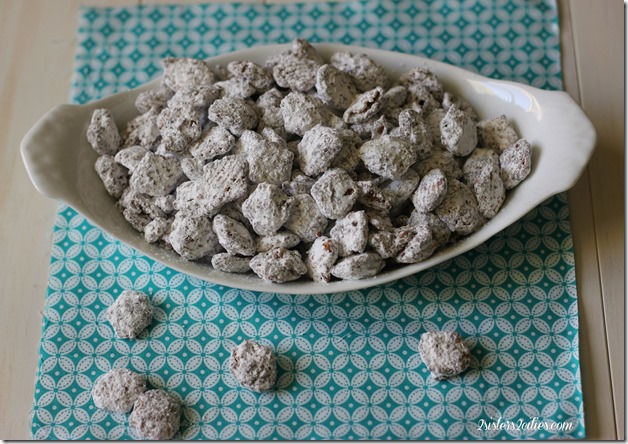
Puppy Chow

Print
Puppy Chow
Author: 2 Sisters 2 Cities
 
Ingredients
  • 9 cups of Crispix or 4½ cups of Corn Chex and 4½ cups Rice Chex
  • 1 cup semi sweet chocolate chips
  • ½ cup creamy peanut butter
  • ¼ cup butter (1/2 stick)
  • 1 teaspoon vanilla extract
  • 1½ cup of powdered sugar
Instructions
  1. In a large bowl, measure out cereal and set aside.
  2. In a medium sized heat proof bowl add chocolate chips, peanut butter, and butter. Cook in microwave for 1 minute and stir. Repeat in 30 second intervals, stirring in-between each turn until completely melted and smooth. Stir in vanilla extract.
  3. Pour the chocolate mixture over the cereal stir until all the cereal is evenly covered.
  4. Add coated cereal into a 2-gallon re-sealable bag and add in powdered sugar. Seal the bag and shake together until all the sugar has coated the cereal. This step can be done in two parts if you don’t have a large enough bag. Just make sure to split the cereal and the powdered sugar.
  5. Once the cereal is coated with sugar, pour out onto a waxed paper lined baking sheet. Let cool and enjoy. Keep in an airtight container.
3.2.1753

Source- Adapted from Chex
sisterk (2)


Filed Under: K's Desserts, K's Recipes, Party Ideas Tagged With: cereal, puppy chow, snack

Boxed Cake Mix Chocolate Chip Cookies

Posted by Keelin Hollenbeck on July 21, 2013

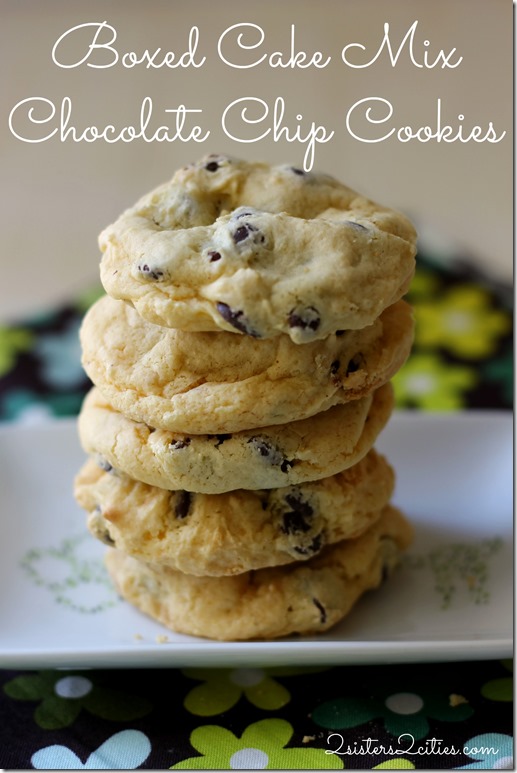
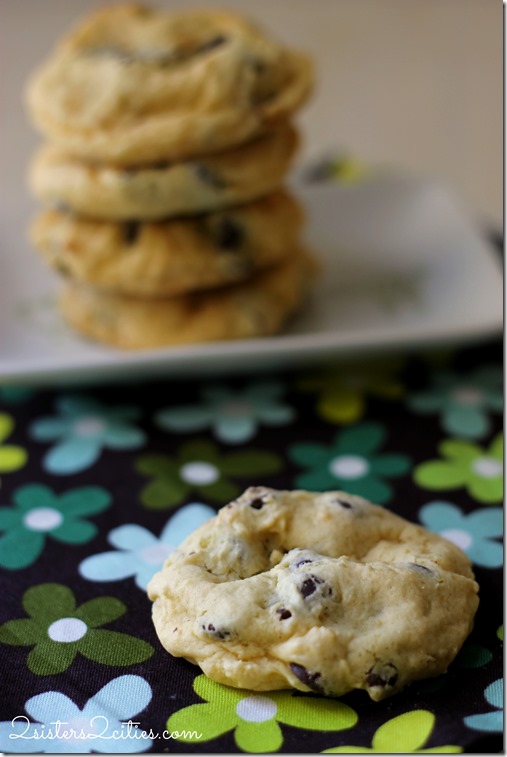
Boxed Cake Mix Chocolate Chip Cookies

I am constantly looking for new recipes for chocolate chip cookies since they are my boyfriend’s all‐time favorite type of cookie.  I have an entire Pinterest board devoted to chocolate chip cookies that I would eventually like to try out.

In college, one of my roommates introduced me to making chocolate chip cookies with a box of yellow or white cake mix.   The cookies came out deliciously puffy and moist and were so easy to create.  Plus, when you are on a college budget you can’t beat the price of cake mix and cooking oil since butter and flour are usually the most expensive ingredients.  This recipe is also an “elbow grease” friendly recipe, therefore no need for a stand mixer!

It has been some time since I made this cookie recipe.  I have moved about 7-8 times since acquiring the recipe and if you can imagine, I had since lost and forgot about the recipe.  However, a few months ago I saw recipes for making cookies with boxed cake mix and it instantly reminded me of that long lost recipe. We happened to have a random box of cake mix on hand so I decided to give the recipe a try.   I say random because I rarely have cake mix sitting in my pantry, but my boyfriend had bought some when he was shopping on his own because he couldn’t believe how cheap it was.  There are a lot of items like this in our pantry…it is one of the pleasures of living with a food-enthusiast man, or what I like to lovingly call a “cookie monster.”

When I brought these boxed cake batter cookies into work they went extremely fast and so many people asked for the recipe.  Sorry,  it has taken me a few months to post this!

Boxed Cake Mix Cookies

Print
Boxed Cake Mix Chocolate Chip Cookies
Author: 2 Sisters 2 Cities
 
Ingredients
  • 1 single box of cake mix (Yellow or White)
  • 1 tsp. baking powder
  • 2 large eggs
  • ⅓ cup canola oil
  • ½ tsp. vanilla extract
  • 1 and ½ cup semi-sweet chocolate chips
Instructions
  1. Preheat the oven to 350 degrees and line baking sheets with parchment paper or a silicone baking mat.
  2. In a large bowl mix together the cake mix and baking powder. In a small bowl whisk together eggs, oil, and vanilla extract. Add the wet ingredients to the dry ingredients and stir until combined. Continue to mix batter until there are no more chunks of dry cake mix. Stir in chocolate chips.
  3. Drop rounded tablespoons of batter onto baking sheets with the medium-sized cookie scoop or measuring spoon. Make sure they balls are at least 2 inches away from each other because they will spread out a little when baking.
  4. Bake for 10 minutes and take out of the oven to let continue cooking on baking sheet. After a few minutes, transfer to a wire rack. Let cool and enjoy!
3.2.1753

Source- Adapted from Sally’s Baking Addiction

sisterk (2)


Filed Under: K's Desserts, K's Recipes Tagged With: boxed cake mix recipes, cake mix, cake mix cookies, chocolate chip, chocolate chip cookies, cookies, yellow cake mix

Caprese Pasta Salad

Posted by Meaghan Barry on July 17, 2013

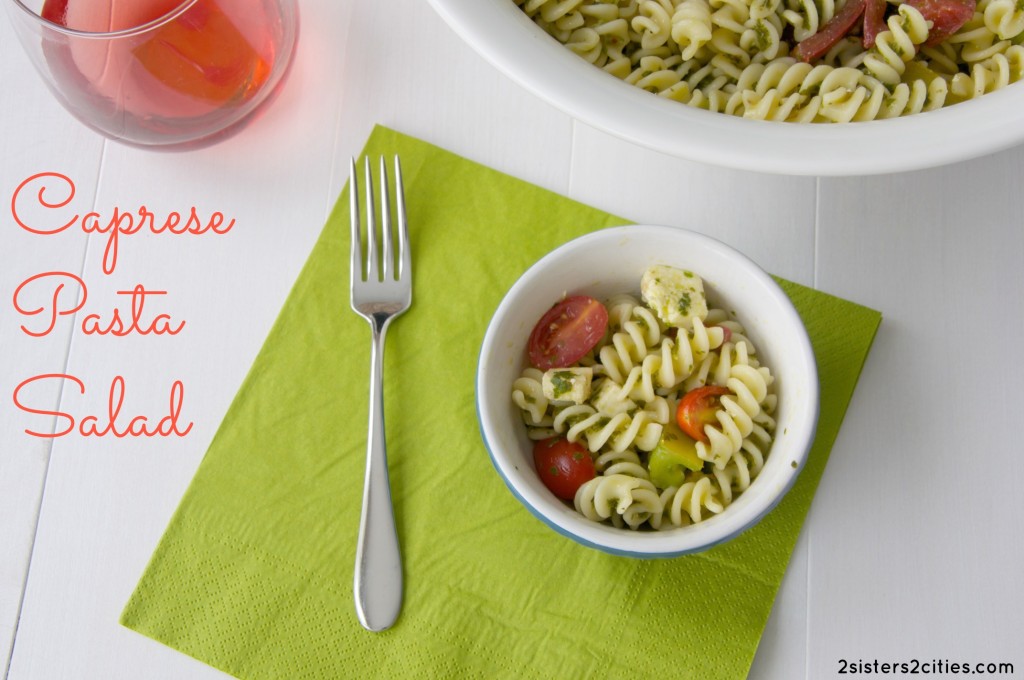
caprese pasta salad

I’ve been too caught up in newborn/toddlerland to post for the past few weeks, but I’ve finally decided to hop back on the blogging train.  I haven’t been cooking too much lately as we’ve also been fortunate to have had a lot of meals brought to us each evening.  Baby N is pretty relaxed during the day, but things get a bit chaotic around dinnertime each night with him and T.  Yesterday, I had big plans to make this caprese pasta salad right after lunch today while both boys were sleeping.  However, T fought his nap big time, N woke up earlier than expected, and I spent any downtime I had trying to make our house look a little less like a scene from Hoarders.

I finally got a chance to start making this caprese pasta salad around 5 last night, but didn’t get a chance to start taking photos until 7 and I was losing natural light fast.  Baby N was a bit fussy so I had him in the Moby wrap while I was photographing.  Hence, these are not the most stylized or perfectly lit/focused photos.  But, I promise what my photos lack, this recipe makes up for in taste!

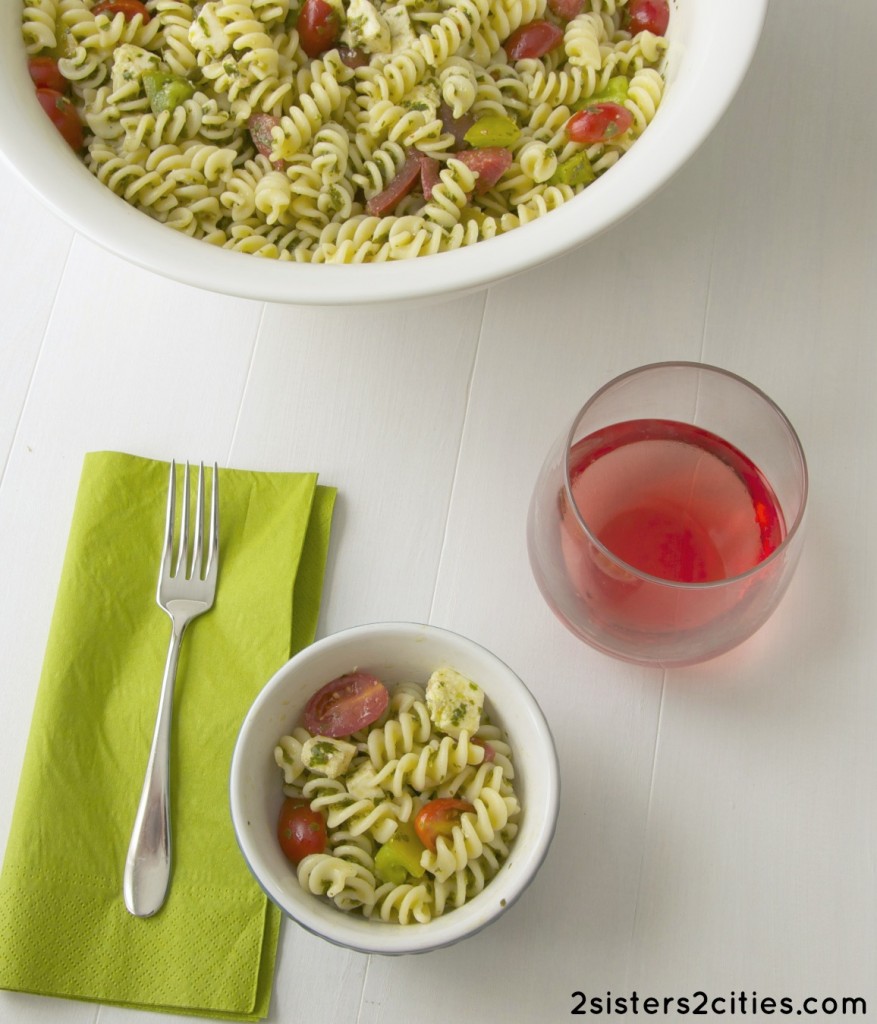
caprese pasta salad

This recipe combines two of my favorite types of summer salads: a good pasta salad made with fusilli and a caprese salad.  I love the bright flavor that the white balsamic vinegar brings to this recipe as well.  While I was making it, I was a bit concerned about using a half a cup of vinegar, but I think this is the ingredient that really makes this recipe shine.  This caprese pasta salad would be a delicious summer dish on its own or served on a side with a piece of grilled chicken or steak.

Print
Caprese Pasta Salad
Prep time:  15 mins
Cook time:  10 mins
Total time:  25 mins
 
Ingredients
  • 4 cups fresh basil leaves
  • 1 pound fusilli pasta
  • ½ cup white balsamic vinegar
  • 1 teaspoon sea salt
  • ¼ teaspoon red pepper flakes
  • ¼ teaspoon freshly ground black pepper
  • ½ cup good quality extra virgin olive oil
  • 8 ounces fresh mozzarella, chopped into bite size pieces (you could also use small mozzarella balls)
  • 1 pint cherry tomatoes, halved or 2 medium heirloom tomatoes, chopped (I used a combination of the two)
  • 2 tablespoons capers, drained
Instructions
  1. Bring a large pot of salted water to a boil and prepare an ice bath in a separate bowl Once water is boiling, blanche basil leaves for 30 seconds. Once they turn bright green, use a slotted spoon to add them to the ice bath. Drain well, squeezing out any excess liquid. Add basil to the bowl of a food processor.
  2. Using the same pot of boiling water, cook pasta according to package directions until al dente. Drain pasta and rinse with cold water until cool. Add drained pasta to a large bowl.
  3. Meanwhile, in the food processor, add the vinegar, salt, red pepper flakes, and pepper to the basil. Process for a few seconds. Continue to process and drizzle in the olive oil slowly through the top of the food processor until fully combined.
  4. Pour dressing over the top of the pasta. Add mozzarella, tomatoes, and capers. Stir together all ingredients until fully combines. Can be served immediately or refrigerated for up to 3 days.
3.2.1753

 Source: Slightly adapted from Love and Olive Oil

sister m signature


P.S. Happy, happy birthday to my favorite co‐blogger of all time!  That glass of rosé is for you!


Filed Under: M's Sides, M's recipes Tagged With: caprese pasta salad, caprese salad, cookout, cookout recipes, heirloom tomato recipes, heirloom tomatoes, mozzarella, pasta salad, summer recipes, tomato recipes, tomatos

Salted Caramel Brownies

Posted by Keelin Hollenbeck on July 14, 2013

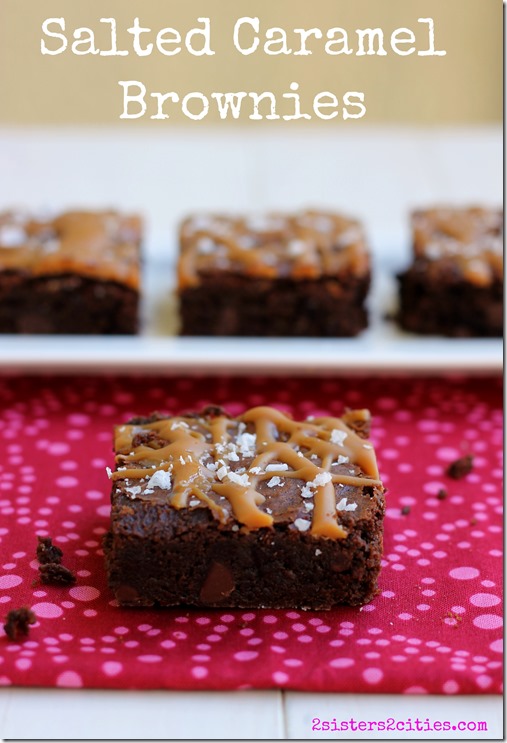
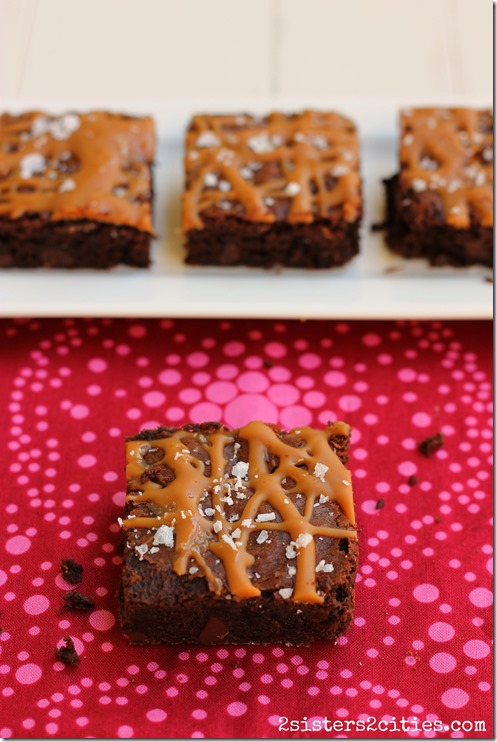
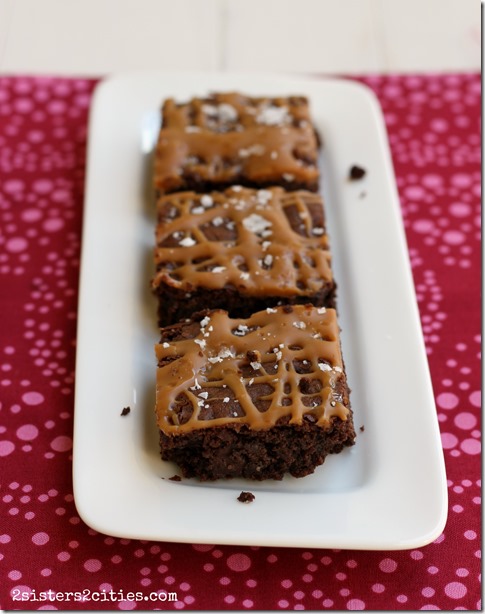
Delicious Salted Caramel Brownies

I realized as I was typing up this post that M and I have a few different recipes on our blog for Caramel Brownies (see here and here for the other recipes.) Can you blame us???  It really is okay because all the recipes are a little bit different and all make spectacular brownies. Salted caramel desserts are starting to become as regular as chocolate chips cookies.

This recipe makes a chewy gooey brownie with chunks of chocolate chips inside, then covered with melted caramel and flaked sea salt.   As you may remember, last summer I made these Sea Salt Caramel Brownies, which were a huge hit at both my family reunion and a baby shower I made them for.   That particular recipe had a homemade caramel sauce baked into the center of brownie and then the top of the brownies were topped with fleur de sel.   The caramel gets baked into the brownie so it sort of soaks in throughout the brownie and makes for an incredibly rich and moist caramel brownie flavor.

For this recipe, I used Maldon flaked sea salt and I loved how big the flakes are.  They gave the brownies the perfect amount of saltiness.  Ina uses this salt a lot in topping her baked goods.  I bought some from Amazon, but since then I’ve also seen it at Whole Foods.

Salted Caramel Brownies

Print
Salted Caramel Brownies
Author: 2 Sisters 2 Cities
 
Ingredients
  • 1 cup butter (2 sticks)
  • 14 oz. semisweet chocolate chips (about 2 and ⅓ cups)
  • 3 oz. unsweetened chocolate
  • 3 large eggs
  • 1½ tbsp. instant coffee granules
  • 1 tbsp. vanilla extract
  • 1 cup, plus 2 tbsp. granulated sugar
  • ½ cup, plus 2 tbsp. AP flour, divided
  • 1½ tsp. baking powder
  • ½ tsp. kosher salt
  • 5-6 oz. caramel bits (such as Kraft’s)
  • 1-2 tbsp. half and half or milk
  • flaked sea salt, such as Maldon
Instructions
  1. Preheat the oven to 350 degrees.
  2. Grease and flour a 9x12x1½-inch baking pan.
  3. In a heat-proof bowl set over a sauce pan of simmering water, melt together butter, 8 oz. of the chocolate chips, and the unsweetened chocolate. Allow chocolate to cool for at least 15 minutes off of the heat.
  4. In a large bowl, stir eggs, coffee, vanilla and sugar together. No not beat the mix, just stir.
  5. Stir the the chocolate into egg mixture and let cool to room temperature.
  6. In a medium bowl, whisk together ½ cup flour, baking powder, and kosher salt. Mix into chocolate mixture.
  7. Toss the remaining 2 tablespoons of flour with the remainder of the chocolate chips. Once the batter mixture is at room temperature stir in the chocolate chips. Spread the batter in the pan.
  8. Bake for 35 minutes. A toothpick pressed in the center should come out clean.
  9. In a microwave safe bowl, add caramel candies and 1 tablespoon of half n’ half or milk. Gradually melt the caramel in the microwave in 15-20 second intervals being very careful it doesn’t burn. Repeat until caramel is melted, using the extra tablespoon of half n’ half or milk if needed.
  10. Once the brownies come out of oven, drizzle the caramel over the hot brownies an sprinkle with the flaked sea salt. Let the brownies cool completely before cutting.
3.2.1753

Source- Adapted from Ina Garten’s Barefoot Contessa Foolproof

Caramel Brownies

sisterk (2)


Filed Under: K's Desserts, K's Recipes Tagged With: barefoot contessa, brownie recipe, brownies, caramel, caramel recipe, chocolate dessert, maldon flaked sea salt, Salted caramel, salted caramel brownies, sea salt caramel brownies

Chicago-Style Hot Dogs

Posted by Keelin Hollenbeck on July 7, 2013

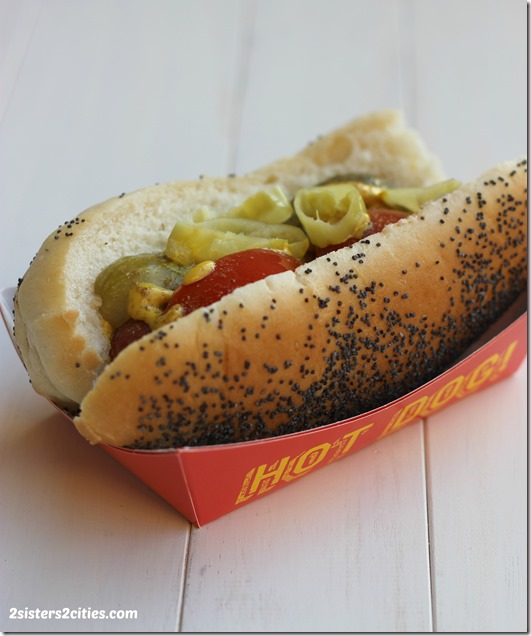
Chicago-Style Hot Dog

As I mentioned in my post about Chicago Deep Dish Pizza and my homemade hot dog bun recipe, my entire family met up in Chicago for my cousin’s wedding a few months ago.  My boyfriend and I had some time to walk around before the rehearsal dinner, so we set out to find hot dogs “dragged through the garden”  (or a hot dog with everything as I now call them).

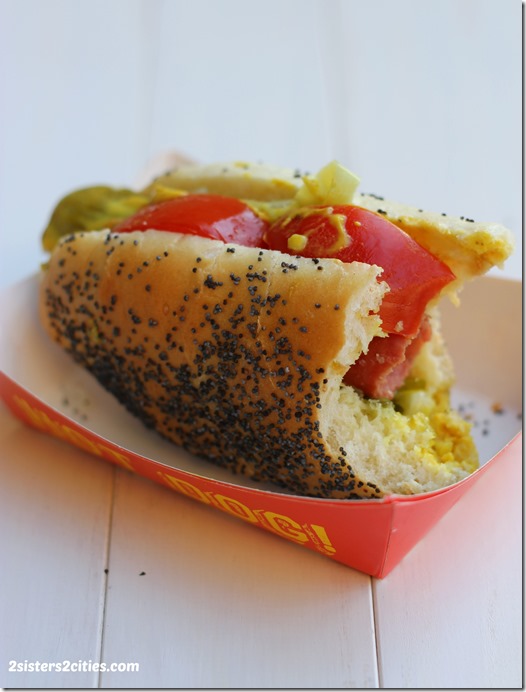
Chicago Style Hot Dog

Chicago-style hot dogs (with everything) are a delicious steamed hot dog on a steamed poppy seed bun, then topped with mustard, relish, chopped onions, a slice of dill pickle, tomato wedges, sport peppers, and celery salt.   They are quite an amazing concoction and I had been craving them since our trip.   After discovering the recipe for hot dog buns with poppy seeds, I decided that we could try to recreate them.

I am obsessed with dill pickles (Claussen is the only type people- let’s get serious here) so I happened to have them on hand, as well as sweet green relish, onions, mustard, tomatoes and celery salt.   I ran out to the store and picked up some Nathan’s Original beef hot dogs, since the Chicago Vienna hot dogs with natural casing are not available around here.  Nathan’s is an East coast brand, but for some reason they carry them out here which I am thankful for. I couldn’t find sport peppers either so I picked up some pepperoncini peppers and sliced them on top.  I know this isn’t the traditional pepper, but I think these ingredients are hard to find outside of the Chicago area.

Print
Chicago-Style Hot Dogs
Author: 2 Sisters 2 Cities
Serves: 2
 
Ingredients
  • 2 all beef hot dogs
  • 2 poppy seed hot dog buns
  • yellow mustard
  • sweet green relish
  • yellow onions, chopped
  • 2 dill pickle spears (Claussen)
  • 4 tomato wedges
  • celery salt
  • sport peppers, or pepperoncini peppers if you live outside the Chicago area
Instructions
  1. In a medium sauce pan, add ½ inch of water to the pan. Heat on medium until a small simmer starts. Add in the hot dogs and cook for about 8 minutes rolling them back and forth every few minutes.
  2. Once hot dogs are cooked take out them out and set aside. Place a steaming basket or metal colander above the water. Place hot dog buns in the steaming basket/colander for a minute or two, covering, until steamed and softened.
  3. Add the hot dogs to the buns. Top with mustard, onions, and green relish (all to your liking) Stick a dill pickle spear on one side between the hot dog and bun, then on the other side wedge the tomato wedges. Top with sport peppers or sliced pepperoncini and finish with celery salt.
3.2.1753

Delicious Hot Dog Buns

sisterk (2)


Filed Under: K's Entrees, K's Recipes Tagged With: chicago, Chicago recipes, Chicago Style Hot Dogs, dragged through the garden, hot dog recipes, hot dogs, hot dogs with everything, Nathan's Hot Dogs, pickles, poppy seed hot dog buns, relish

S’more Ice Cream

Posted by Keelin Hollenbeck on July 3, 2013

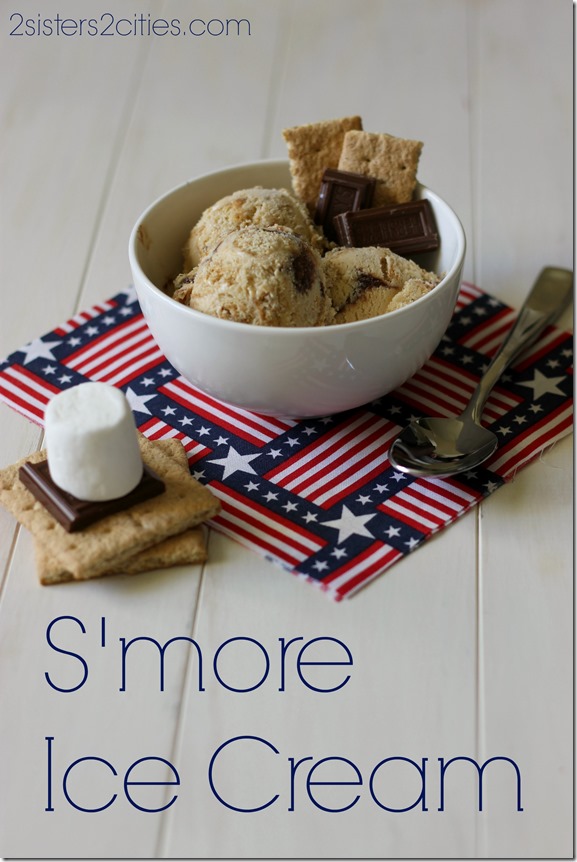
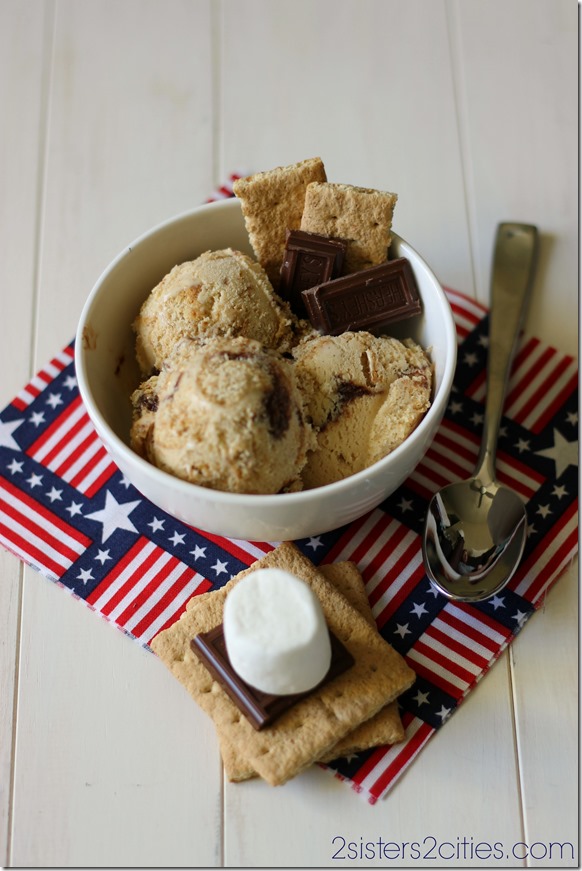
S'more Ice Cream for Dessert

Happy Fourth of July everyone!   I hope you have a great menu planned for your long weekend . I am sure with all this time off, my boyfriend and I will be cooking/baking up a storm.   Here is a last minute dessert idea to celebrate your Independence Day with.

Last weekend I tested out another new flavor of ice cream with my new ice cream maker.  The pistachio ice cream I made first had turned out so well I was excited to try another flavor. Since it is Fourth of July weekend,  I thought it would be the perfect opportunity to make some s’more ice cream.   This ice cream has toasted marshmallow-flavored ice cream with graham cracker pieces and fudgy layers, making it the perfect dessert for summer time.   I could have really just stopped at the toasted marshmallow ice cream because the flavor was incredible!  It would also be the perfect ice cream to make s’more ice cream sandwiches with, by layering the marshmallow ice cream between a layer of Hershey’s chocolate squares and graham cracker halves.  However you decide to make this ice cream, you will be happy with the results!  I scream, you scream, we all scream for ice cream!!  (If you look close enough to my picture you can see my boyfriend watching tv in the background..whooops!)

S'more Ice Cream

Print
S'more Ice Cream
Author: 2 Sisters 2 Cities
 
Ingredients
For Toasted Marshmallow Ice Cream:
  • 1 bag marshmallows, preferably large but small will do
  • 1 tbsp. vanilla bean paste
  • 2 cups whole milk
  • 5 egg yolks
  • ½ cup sugar
  • Pinch of salt
  • 1 cup heavy cream
  • 1 tsp. vanilla extract
For the Fudge Layers
  • ½ cup granulated sugar
  • ½ cup water
  • ⅓ cup light corn syrup
  • 6 tbsp. Dutch-process cocoa powder
  • ½ teaspoon vanilla extract
To add to Ice Cream:
  • 1½ cups coarsely chopped honey graham crackers
Instructions
  1. Line a baking sheet with parchment paper. Place marshmallows on baking sheet. Place the pan under the broiler for 30 seconds to 1 minute until toasted, watch closely because they will burn easily. Turn marshmallows over and toast the other side the same way. Once both sides are toasted, place marshmallows in a blender and set aside.
  2. Add milk to a medium saucepan, add in vanilla bean paste and slowly bring mixture to a simmer.
  3. In a large heatproof bowl beat the egg yolks, sugar and salt together with a whisk. Slowly add warmed milk to the egg mixture and return to saucepan. Heat mixture over medium-low heat stirring the entire time with a heat proof rubber spatula. Stir until the custard thickens and easily coats the spatula (around 170-175 degrees F.) Pour the custard through a metal strainer into a large bowl. Let cool for 15 minutes.
  4. Add the custard into the blender (where the toasted marshmallows are) and blend together until the marshmallows are completely broken down. Add heavy cream and vanilla extract to blender and blend for 10-15 second to combine. Pour the mixture into lidded container and refrigerate overnight.
  5. To make Fudge Layers: In a medium saucepan set over medium heat, whisk together sugar, water, corn syrup, and cocoa powder. Whisk the entire time, until the mixture comes to a low boil. Allow mixture to boil for one minute, continuing to whisk. Remove the chocolate sauce from heat and stir in vanilla extract. Add mixture to a jar or an air-tight container and let cool before covering. Place in the refrigerator and let cool for at least 2 hours before layering into ice cream.
  6. Before adding the custard to the ice cream maker, stir vigorously until mixture is smooth. Add custard to your ice cream maker and churn ice cream according to manufacturer’s instructions. When ice cream is done, gently fold in chopped graham crackers with a rubber spatula. On the bottom of the container you plan to store ice cream in, add a layer of fudge sauce to the bottom. Scoop the ice cream into the container, adding layers of the fudge sauce between layers of ice cream (do not stir the ice cream at this point since you will want the layers of fudge.) Continue layering ice cream and fudge sauce, ending with an ice cream layer. Cover container and freeze ice cream until firmer, about 2-3 hours.
3.2.1753

Source-  Adapted from Brown Eyed Baker

sisterk (2)


Filed Under: K's Desserts, K's Recipes Tagged With: fancy s'mores, fourth of july, fudge sauce, ice cream, ice cream recipes, S'more, s'more ice cream, s'mores, s'mores recipes, toasted marshmallow ice cream

Introducing Baby N!

Posted by Meaghan Barry on July 3, 2013

I’ve been a little quiet on the blogging front lately and just wanted to share why.  Baby N decided to grace us with his presence a week before his due date!  We’ve been happily adjusting to our new family of four over the past couple of weeks.  We don’t normally share photos of ourselves or our family on 2 Sisters 2 Cities, but like with Baby T, I wanted to share one snugly newborn photo.  This photo was taken the morning after he was born.

baby n

I think he looks pretty much just like his older brother did when he was born!  N is a chill little guy and his older brother has been really great with him (for the most part anyway.)

Hope you have a great Fourth of July weekend!  Just in case you were looking for any last minute recipes, here are ten 2S2C recipes perfect for your summer cookout:

  1. Herbed Potato Salad
  2. Homemade Hot Dog Buns
  3. Fresh Squeezed Lemonade
  4. Pistachio Ice Cream
  5. Salt Potatoes
  6. Greek Pasta Salad
  7. Baked Beans
  8. Buttermilk Biscuits (for Strawberry Shortcake)
  9. Fourth of July luncheon menu
  10. 2012 Fourth of July round up

sister m signature


Filed Under: M's post Tagged With: About 2 Sisters 2 Cities, baby, baby announcement, baby n, fourth of july

Fresh Squeezed Lemonade

Posted by Keelin Hollenbeck on July 2, 2013

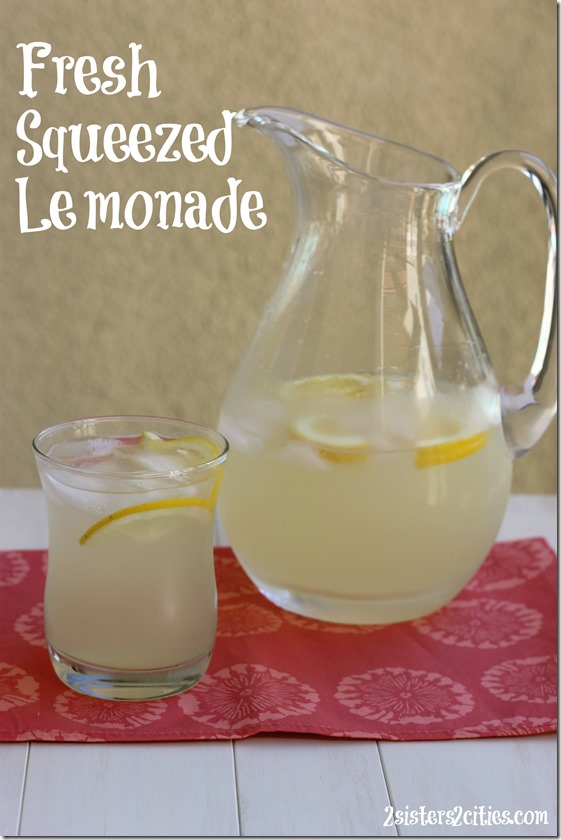
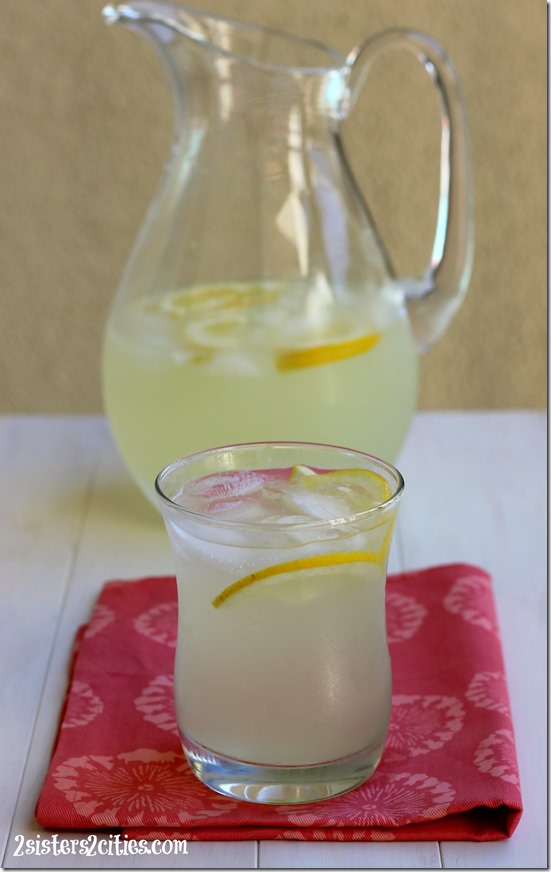
Fresh Squeezed Lemonade

Although I love a chilled glass of rosé in the summer and the occasional icy cocktail, sometimes I love a glass of freshly squeezed lemonade.  My favorite summer drink is to mix lemonade with iced tea and make what I call a half ‘n half, but it is also known as an Arnold Palmer.

When I was in high school, I worked at the New York State Fair for the two weeks it ran every year in Syracuse.  It was a great way to make extra cash to buy my back‐to‐school clothes.  I worked for a fried dough place that also owned lemonade stands.  The lemonade stands were in the shape of a lemon sliced in half and then propped open.   I would always work in the lemon which was fun because I got to people‐watch and drink lemonades.   The occasional fried dough also helped.  Whenever I drink fresh lemonades, it reminds me of when I worked in the lemon.

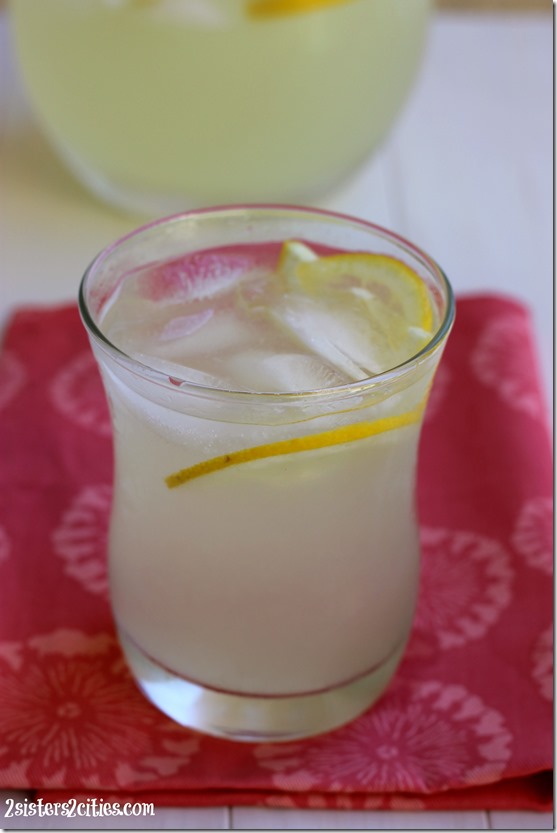
The recipe for lemonade is pretty basic; lemon juice, sugar, water and ice.  In this recipe I use super fine sugar because it dissolves easier than regular granulated sugar.  This sugar is found in most grocery stores.  If you can’t find it you can use regular sugar…you may just have to stir it a little longer.   I give a range for the amount of sugar because it is based on personal preference.  My lemons were very tart so I used the full 3/4 cups of sugar.    I used my hand lemon squeezer which works very well for juicing.   This recipe can be halved or double based on your crowd size.

Serve a pitcher this week at your Fourth of July party with a pitcher of ice tea!  You could also use this recipe to make Arnold Palmer popsicles or basil lemonade.

Glass of Fresh Lemonade

Print
Fresh Squeezed Lemonade
Author: 2 Sisters 2 Cities
 
Ingredients
  • 1 cup of lemon juice, from 4-5 lemons
  • ½-3/4 cup of super fine sugar
  • 4 cups cold water
  • 1 cup ice
  • lemon slices, for garnish
Instructions
  1. In a large pitcher add all ingredients and stir vigorously until all the sugar is dissolved. Serve with additional ice if needed.
3.2.1753

Source- Adapted from Ina Garten’s The Barefoot Contessa Cookbook

Lemonade

sisterk (2)


Filed Under: K's post, K's Recipes, Party Ideas Tagged With: arnold palmer, fourth of july menu ideas, fourth of july party, fourth of july recipes, fresh lemonade, fresh squeezed lemonade, lemonade, lemons, non-alcoholic drinks, summer drinks, summer recipes

Pistachio Ice Cream

Posted by Keelin Hollenbeck on July 1, 2013

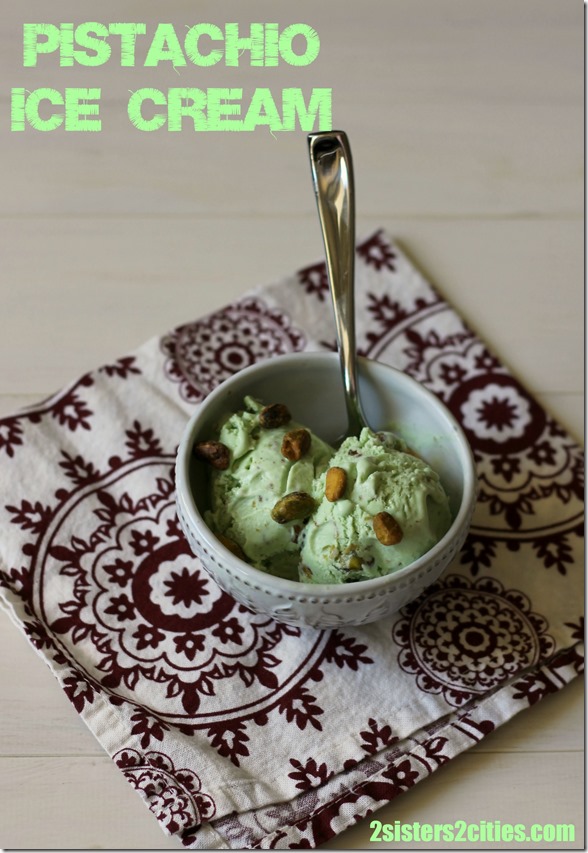
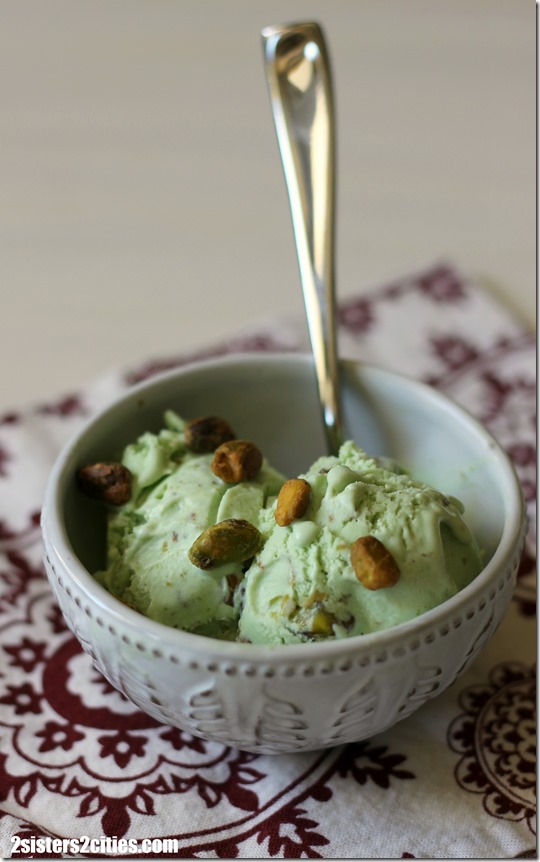
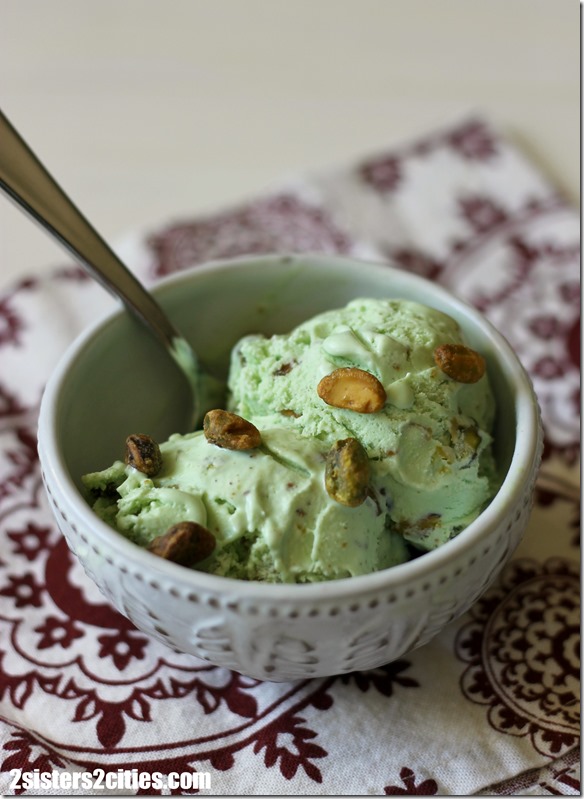
Pistachio Ice Cream

I finally indulged in a KitchenAid ice cream maker attachment for my mixer the other weekend.   I was planning to wait for my birthday that is in a few weeks, but I found a really great deal on one that I could not say no to.  It was extremely difficult to decide on what flavor ice cream I wanted to create first.    I read through lists and lists of flavors as my boyfriend and I drove to the grocery store.   My favorite type of hard ice cream is chocolate with peanut butter swirl, which we happened to have a pint of in the freezer.  We decided to go my boyfriend’s favorite flavor, pistachio nut.

I found an awesome recipe online and picked up the ingredients while we were grocery shopping.   I was able to find shelled pistachios which only came in salted.  I rinsed the salt off of the 1 and 1/3 cups of pistachios that were going to soak in the milk/cream mixture and then baked them for 5 minutes in the oven to dry them out.   I kept the other pistachios that were added to the ice cream salted and it seemed to work out perfectly.   I added a small amount of green dye to the ice cream to make it looks like the classic pistachio ice cream.  This is optional of course.

The custard tasted like delicious pistachio ice cream right away so we anxiously waited for it to chill, churn into ice cream and then freeze all the way in the freezer.  When we finally got to taste the end results, it was awesome!   I was very impressed with my first ice cream making experience.   I am not over-exaggerating when I say thi,s but it was the best pistachio ice cream I had ever tasted!

Homemade Ice Cream

Print
Pistachio Ice Cream
Author: 2 Sisters 2 Cities
 
Ingredients
  • 1⅓ cups shelled roasted pistachio nuts
  • ¾ cup sugar
  • 2 cups heavy cream
  • 1 cup whole milk
  • pinch of salt
  • 6 large egg yolks
  • 1 tsp. vanilla extract
  • ½ tsp. almond extract
  • Green food coloring
  • ¾ cups pistachios, roughly chopped
Instructions
  1. If your pistachios are salted- follow this first step. Rinse 1⅓ cup of pistachios with water in a colander. Dry nuts on a towel and spread out on a baking sheet lined with parchment papers. Place in oven heated to 350 degree and place in the over for five minutes to dry.
  2. Add nuts to a food processor and grind into small pieces. Set aside.
  3. In a medium sauce pan; add milk, sugar, 1 cup of cream, and salt. Heat on medium-low heat until warmed. Take off heat and stir in ground pistachios. Let soak for 30 minutes.
  4. Strain the nut mixture liquid with a mesh strainer, apply pressure to the nuts to make sure all the liquid comes out. Dispose the nuts and add milk mixture back into sauce pan.
  5. In a large heat proof bowl add the remaining 1 cup of cream to bowl and place cleaned mesh strainer on top.
  6. In a medium sized bowl beat 6 egg yolks with a whisk. Slowly whisk egg yolks into sauce pan with milk mixture. Heat mixture over medium heat stirring the entire time with a heat proof rubber spatula. Stir until the custard thickens and easily coats the spatula.
  7. Pour the custard through the strainer into the cream in the large bowl. Stir to combine.
  8. Mix in the vanilla and almond extract into custard.
  9. Add custard to an air-tight container and refrigerate until completely chilled.
  10. Add chilled custard to your ice cream maker and follow the manufacturer’s instructions. Once ice cream is churned add in green food coloring, adding a few drops at first and working up to the green color you prefer (this is optional, it does not add to the flavor.)
  11. Gently stir in roughly chopped pistachios and place back into an airtight container. Freeze for an addition 3-4 hours until complete frozen. Serve and enjoy!
3.2.1753

Bowl of Pistachio Ice Cream

 Source: slightly adapted from Brown Eyed Baker

sisterk (2)

Related Posts Plugin for WordPress, Blogger...


Filed Under: K's Desserts, K's Recipes Tagged With: dessert recipe, desserts, frozen dessert, homemade ice cream, hot weather treats, ice cream, ice cream maker, ice cream recipes, Pistachio Ice Cream, pistachios, summer recipes, summer treats

Recent Posts

  • Easy Holiday Office Party Tips
  • 5 Steps to an Easy Football Party
  • Gingerbread Biscotti
  • Holiday Coffee Bar and Thanksgiving Recipes
  • Soft Sugar Pumpkin Cookies
  • Cinnamon Sugar Apple Cake
  • Hello Pumpkin Season!
  • Make Your Own Milkshake Party!
  • Mama’s Pickles
  • S’more Cookies

Categories

  • About 2 Sisters 2 Cities (7)
  • Books (8)
  • Crafting & DIY (22)
  • Design & Decorating (15)
  • Gardening (5)
  • Giveaway (14)
  • Guest Bloggers (8)
  • K's post (46)
  • K's Recipes (191)
    • K's Desserts (75)
    • K's Entrees (23)
    • K's Sides (24)
  • M's post (72)
  • M's recipes (167)
    • M's Entrees (21)
    • M's Sides (14)
    • M's Desserts (30)
  • Organizing (7)
  • Party Ideas (49)
  • Uncategorized (1)
  • Vacation (12)
Stitch Fix

Archives

Blogroll

  • Annie's Eats
  • Bake at 350
  • Baked Bree
  • Boston Harbor Beacon
  • Confections of a Foodie Bride
  • Cook Like a Champion
  • Erin’s Food Files
  • Forever and a Recipe
  • Framed Cooks
  • Oh Happy Day
  • On Common Ground
  • Pennies on a Platter
  • Pink Parsley
  • Recipe Girl
  • Sally's Baking Addiction
  • Simply Scratch
  • The Curvy Carrot
  • The Pioneer Woman
  • Tidy Mom
  • Two Peas & Their Pod
  • What’s Gaby Cooking
  • Young House Love
Increase your website traffic with Attracta.com

grab a 2 sisters button!


Copyright © 2014 ~ 2 Sisters 2 Cities | Blog Design by Minx Design